Inspecting reduced wall thicknesses and no pipe access from the outside… the perfect challenge for ultrasonic pipe robots.
Special requirements demand special tools... And the two came together in Paris/France in the inspection task commissioned by French energy supply and district heating network operator "Compagnie Parisienne de Chauffage Urbain", short CPCU, and the ultrasonic pipe robot technology of INSPECTOR SYSTEMS. But let's not get ahead of ourselves...
Unlike destructive material testing, non-destructive testing (NDT) means the test will not affect or even impair the suitability for use of the material to be tested. The NDT works on the basis of physical measuring technology, using the entire spectrum of possible energy interactions made possible by physics. This means that for the test, the materials are exposed to defined energy forms and, depending on the task, one energy form is chosen that will result in a maximum possible useful signal after the energy interaction. However, the principle that the introduced energy may not alter the material still applies.
Possible approaches include static testing methods based on the measurement of a field, and dynamic methods in which the interaction of elastic or electromagnetic waves is recorded. The latter include ultrasonic testing, one of the most frequently applied procedures for non-destructive tests, which can be used for almost all technical materials.
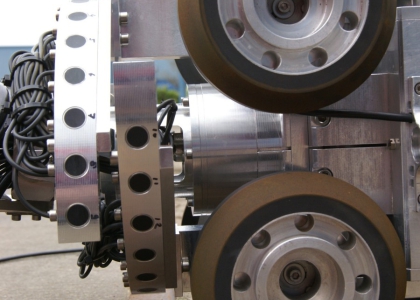
The ultrasonic inspection robots from INSPECTOR SYSTEMS have been used for many years and are developed and improved continuously. These are highly sophisticated testing systems for the non-destructive measurement of wall thicknesses and defects of complex or difficult to access pipes. The connecting link to the tested material is an ultrasonic model that is unique in this form. Its continuously rotating ultrasound inspection probe scans the entire pipe inner surface while travelling through the pipe. In addition, a specially designed gimbal-mounted suspension system ensures that the ultrasound generated by the ultrasound probe is coupled optimally in the material to be tested. To be independent of external coupling media, it is possible to feed water to the ultrasound inspection probe from the outside. As a result, filling of the pipe during the actual test is not required. The used ultrasound software provides optimal visualisation and evaluation of the ultrasound signals to achieve real-time representation of the volume images while recording the data.
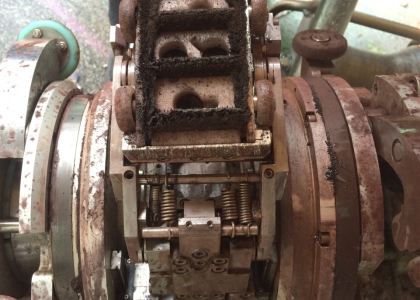
In the specific case, a condensate return pipe of a steam district heating network was to be inspected. Once the steel pipe with an inner diameter of 201 mm and a wall thickness of 7.5 mm had been cooled down to a temperature below 50°C, an ultrasonic inspection robot of the type IS 8-12“ was inserted at two different places into the system. Reduced wall thicknesses and other areas exposed to corrosion were detected over a length of approx. 300 metres. As the condensate flows along the pipe base of the return pipes, it could be concluded that potential defects would mainly be found in this area.
This presented no problem for the pipe robots and the ultrasonic measuring technology of INSPECTOR SYSTEMS. The robot was inserted and, self-propelled by its own drive elements, it travelled independently through the pipe at a constant speed while performing an ultrasonic wall thickness measurement as 100% control. A high-resolution pan-and-tilt camera integrated in the pipe robot additionally provided visual inspection simultaneously with the wall thickness measurement.
All the results could be used and contributed to further assessment of the total project.


